
You have no items in your shopping cart
Short Path Distillation - Step by Step Guide and SOP
- Posted on
- By Goldleaf Scientific
- Posted in Short Path Distillation
- 7
Short path distillation
Do you need help selecting, setting up, or fine tuning a short path distillation kit? Goldleaf has been supplying and educating the community for years about the practice of short path distillation.
Call us anytime at (510)487-1390 for help with any questions. Or email us at [email protected] to get more info about the Goldleaf Scientific short path set ups.
Shop our available kits here: https://www.goldleaflabs.com/distillation/full-short-path-kits/

How does short path distillation work?
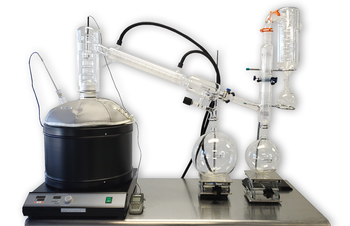
Short path distillation systems have many names, such as modular distillation, fractional distillation, and obviously short path. Do not confuse this step with extraction processes, this is technically the final stage of refinement. The short path distillation equipment consists of glassware assembled to make up the unit along with some recirculating water heaters, a vacuum pump, and heating elements.
Heating Element: Digital Heating/Stirring Mantles provide the energy required to boil a solution. A magnetic stirrer including creates agitation in the boiling flask.

Recirculating Water Heater: Huber CC208 Heater pumps hot water through the condenser to maintain precise temperature needed for molecular separation of desired compounds.

Immersion Chiller: Polyscience IP-100 can be used in place of dry ice or liquid nitrogen on your cold trap. This keeps your vapor trap ice cold and catches any volatile gasses that could make their way to the vacuum pump and cause damage.

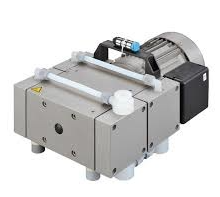
Vacuum Pump: Welch 4-Head Chemical Resistant Diaphragm Pump can safely be used on a short-path as it is strong enough to pull deep vacuum and chemically resistant enough to handle any vapors that reach it.
Boiling Points
They key to this process is understanding the boiling points of the compound you are trying to collect. A short path distillation system works by adding your solution into a boiling flask and heating it up to reach the boiling point of your target compound. The size of your boiling flask will determine how much material you can process at a time, usually between 500mls and 20 Liters. Luckily this technique does not take up much lab space so they can be installed in a small section of the lab and operation is not very intensive.
Fractions
When the solution is heated, vapor will evaporate out of the main boiling flask, travel up the distillation head, and be cooled enough to recondense to oil along your condenser. These components create an advantage by having the vapor only travel a short distance before they are re-condensed into the end products. Certain compounds stay in vapor form and travel over your final product into a cold trap for waste products, while your desired compounds re-condense into a liquid form and collect as your end product.
Pure Distillate
As temperatures are raised, undesirables like residual solvents are removed and you are finally left with pure distillate. The compounds you target, specifically THC, will create fully decarbed end products that achieve high purity due to the level of separation. Cannabis distillation in a vacuum system is considerably lower cost from other distillation units and offer many benefits due to their ease of modifications. Short path distillation process works for any number of compounds that can be collected as long as you account for their boiling point and what temperature they re-condense at to slightly adjust your operation.
Step by Step Guide
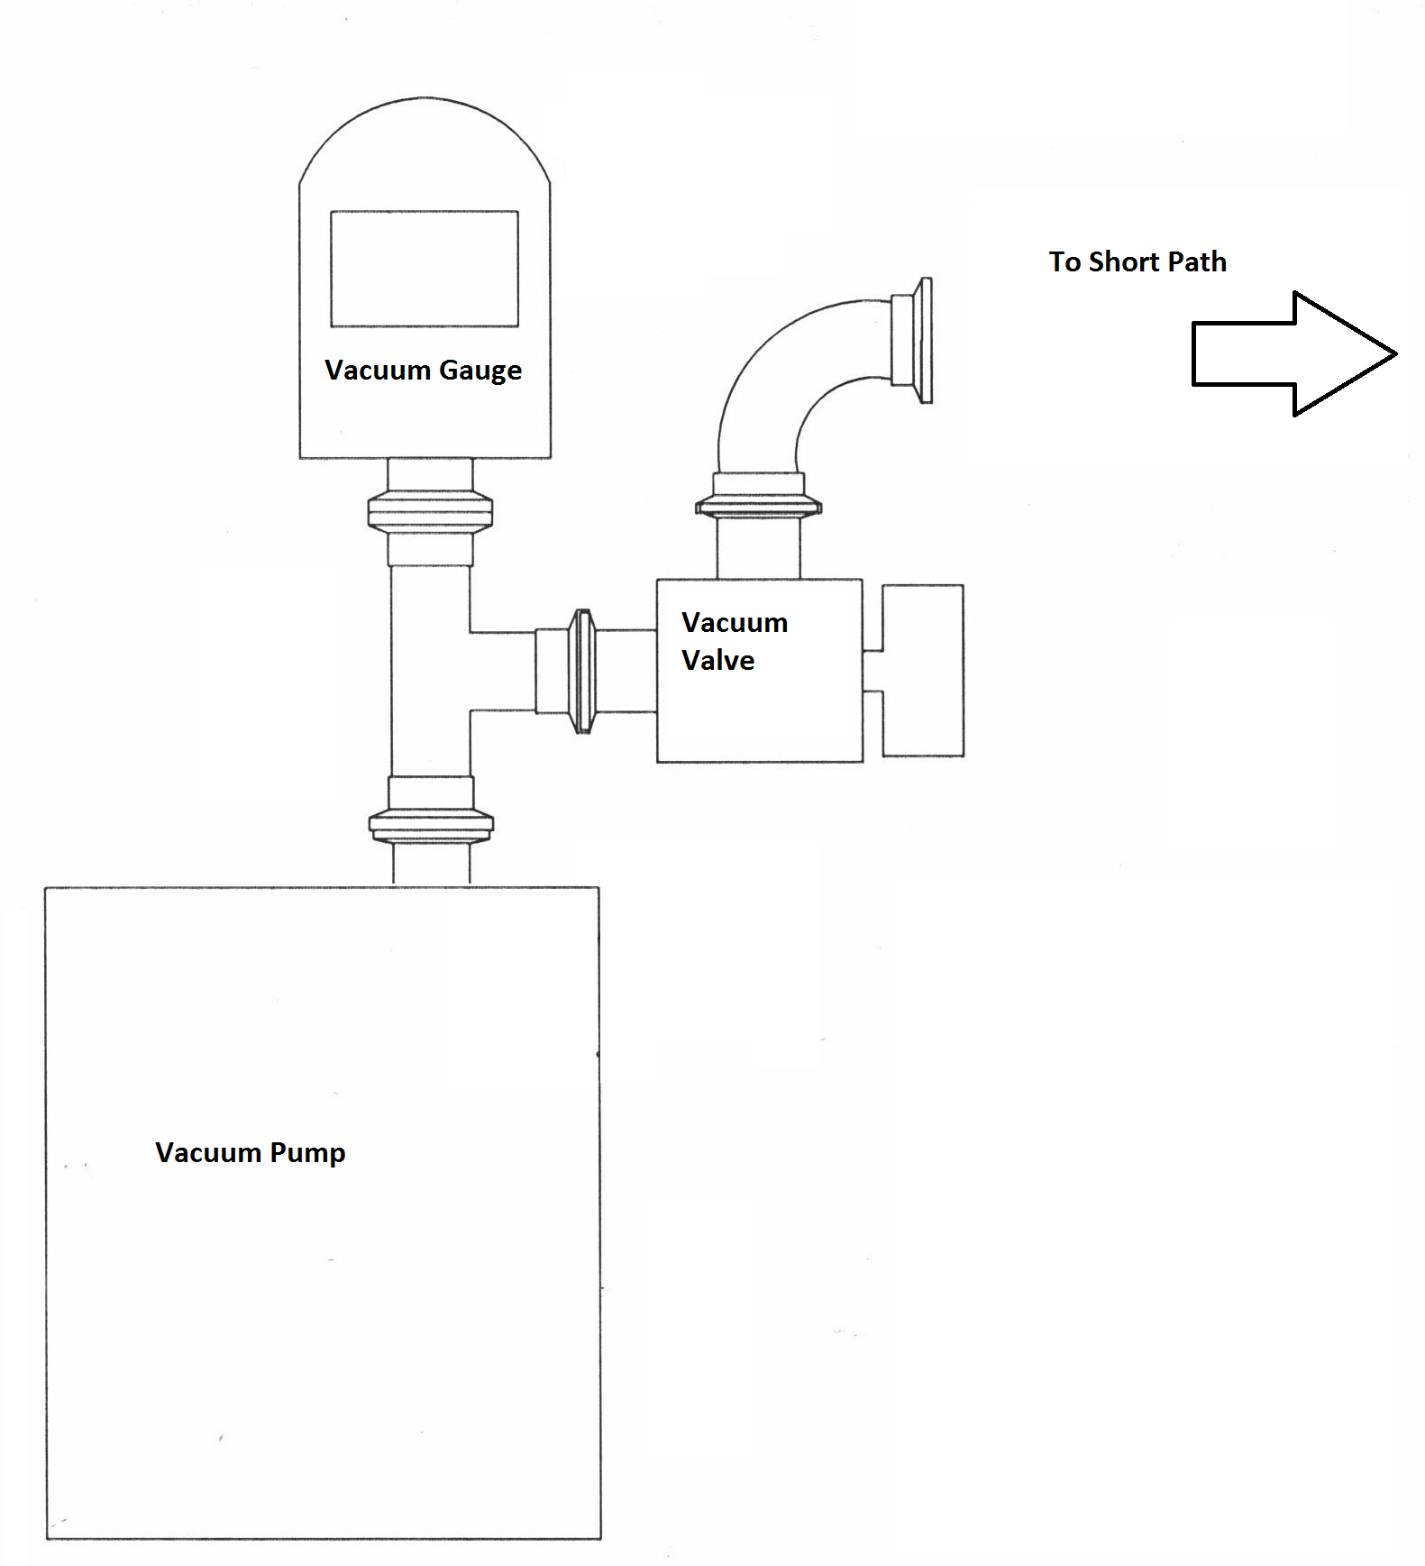
Completely assemble your short path distillation kit. Grease all joints and make sure everything is vacuum tight. Connect pump, turn on, and allow to reach full vacuum. After 5-10 mins the gauge should read <50 millitorr (micron). If it does not you may have a leak somewhere and will need to identify the leak before continuing.
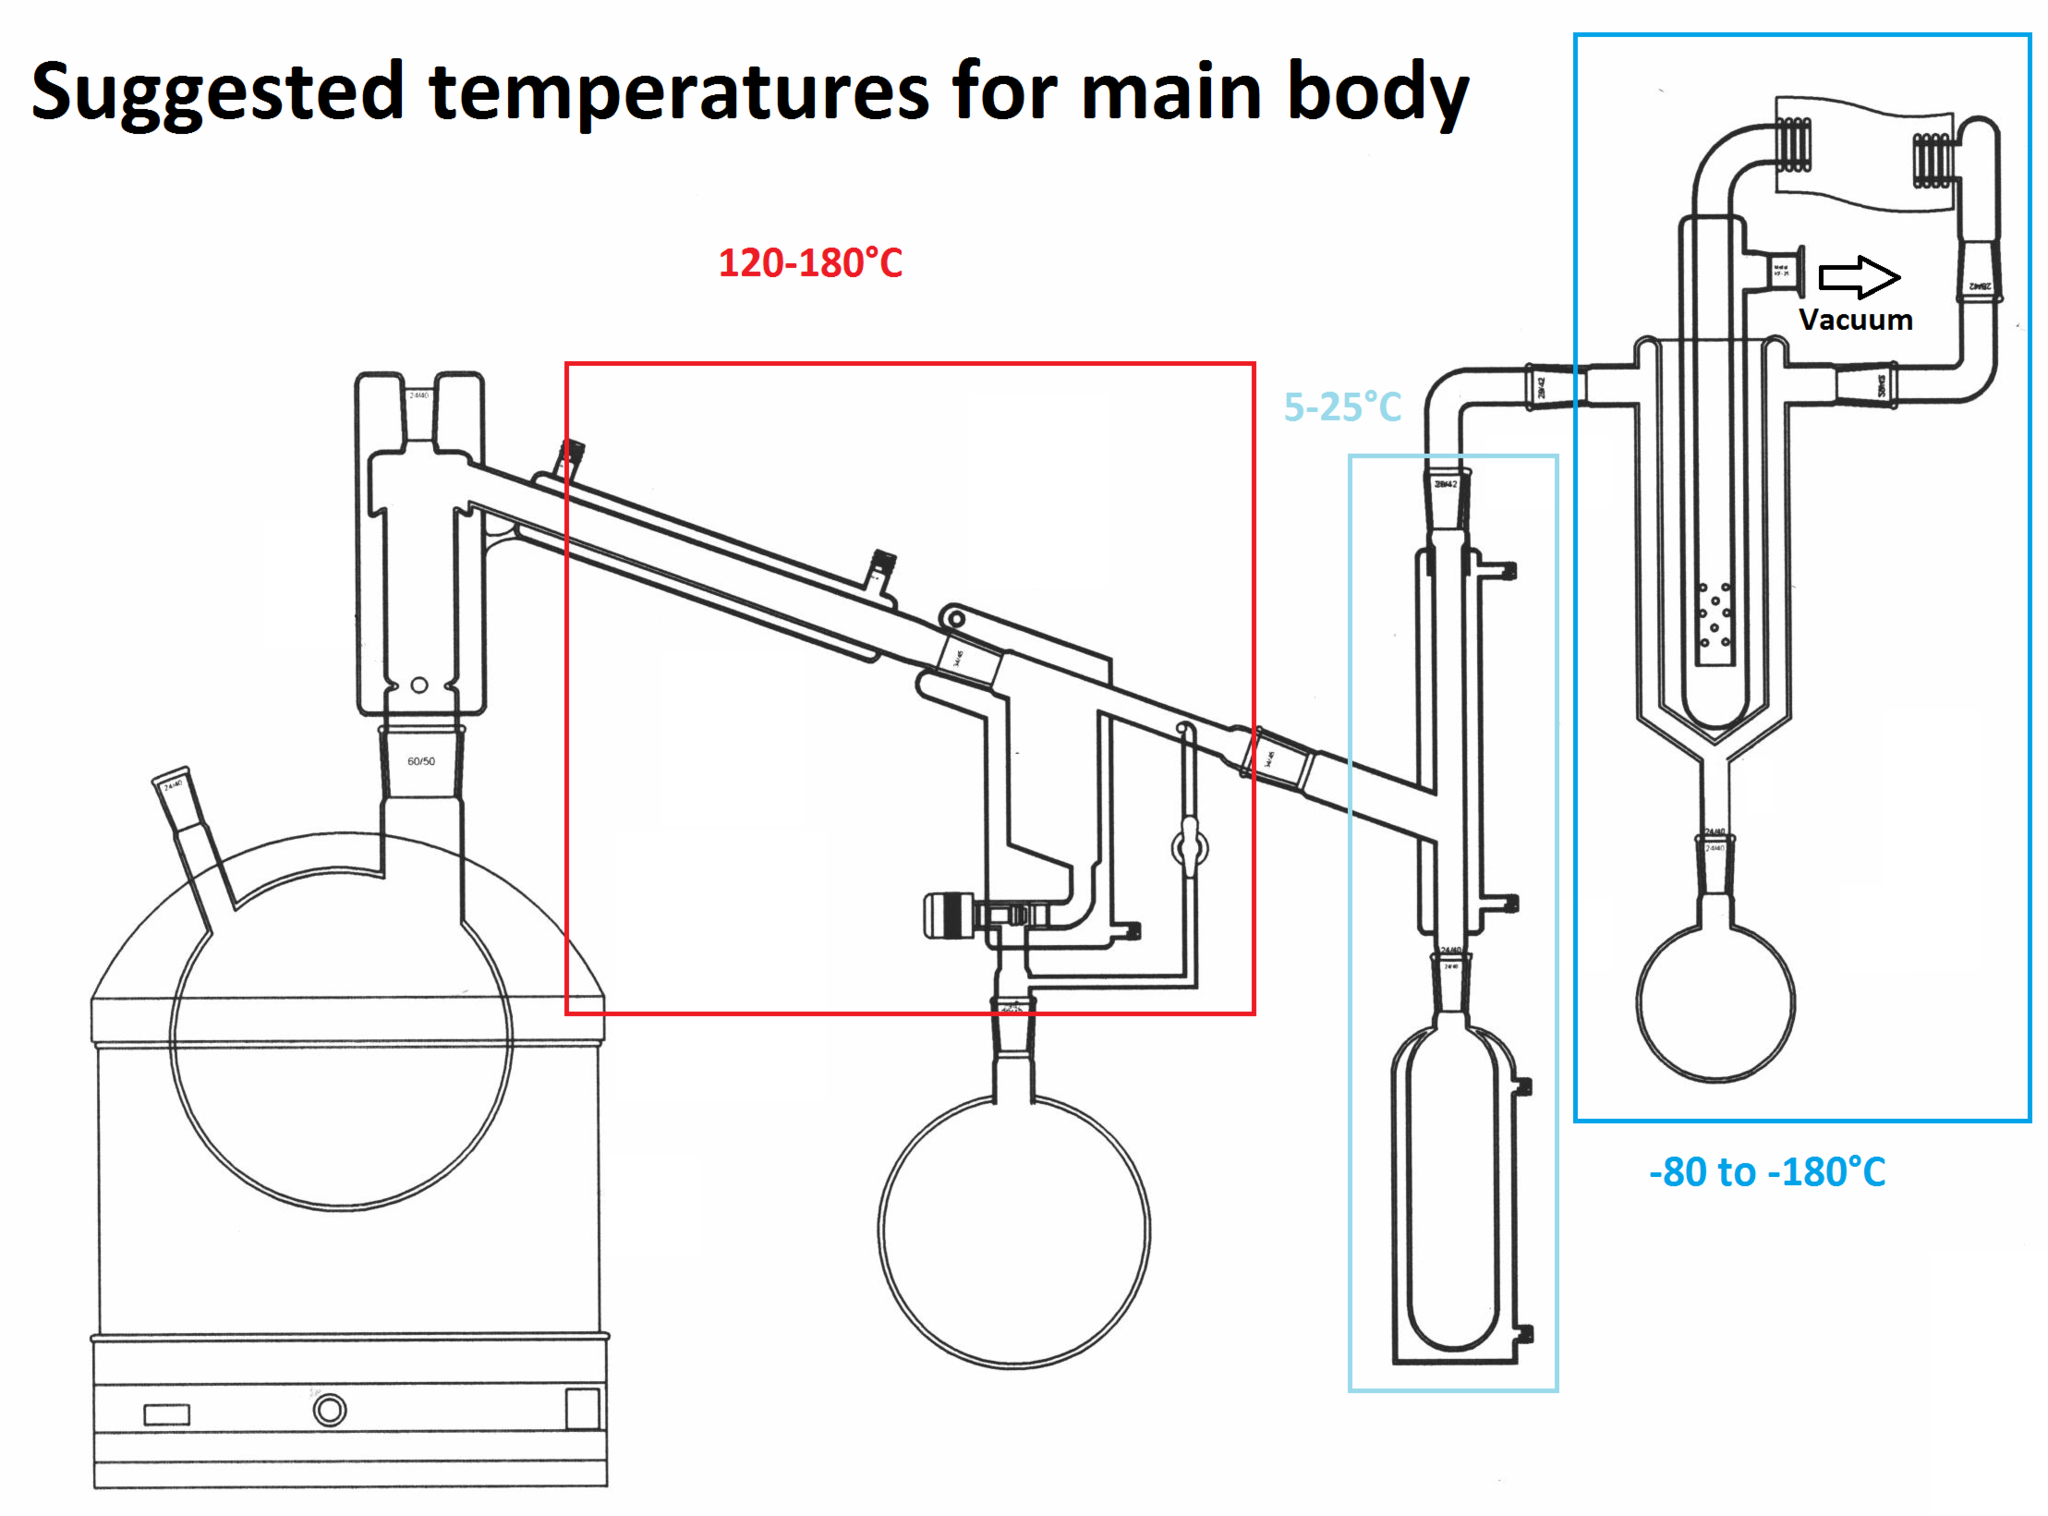
Connect the heater/chiller to the condenser part of the distillation head and jacketed receiver and begin to circulate at the minimum set value. Note: the fluid must enter at the bottom and exit out of the top of any condenser or jacket. Not all kits may include a jacketed receiver.
Connect a small chiller or cooling system to the condenser and jacketed bottle between the cold trap and the jacketed receiver. Any temperature between 0 to 25°C is enough to cool, the colder the better but do not allow it to ice (i.e. do not go below 0°C).
Add dry ice or an immersion chiller to your vacuum trap then add alcohol. Keep adding either dry ice or alcohol until the trap is filled and the liquid has become roughly as viscous as oil or syrup.
Start the mantle temperature at 45-60°C and apply vacuum (do not apply heat to a sealed vessel without first applying some vacuum or opening to atmosphere). The vacuum will need to be throttled to prevent over boiling or stacking (aka muffin). Continue to both slowly open the valve to the vacuum and raise the temperature of the mantle. Try and prevent the vacuum gauge from reaching above 500 millitorr during this process. Continue until your fraction begins to thicken (approx. mantle temp 140°C).
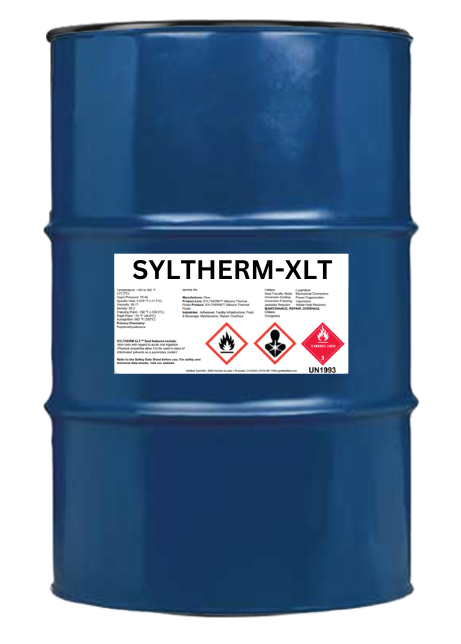
Adjust the circulation temperature in the head to 140-180°C (actual value based on preference) NOTE: Temperatures above 120°C are going to require a special heat transfer fluid called Syltherm. The tubing for this section, the hose barbs, and any other materials that meet the fluid must be made of viton, PTFE, PFA, or other materials capable of withstanding prolonged use with temperatures up to 200°C. Do not use silicone tubing. If you do not have the appropriate equipment do not exceed 120°C. Do not use silicon tubing with silicone heat transfer fluids such as Syltherm.
Warning: High temperature fluids can scald and burn. If the system leaks it will melt, burn, or smoke materials it meets and will be very difficult to stop the leak. Proceed with caution.
Continue to raise the temperature on the mantle until the condensed material is free of any coloration or streaks of impurities.
When you are confident your collected fraction is free from impurities you can begin collecting the main body.
With your jacketed receiver first close the valve to the collection flask. Next release vacuum on the collection flask by turning the glass stopcock valve. Note: Rotating one way will pull vacuum, the opposite direction will release vacuum. If you connect the valve to an inert gas supply, it will blanket your collection flask and prevent oxidation of your collected fractions.
Once the vacuum is release remove the collection flask and replace with a new clean flask. Slowly rotate the glass stopcock 180°. This will vacuum the flask and when completed (typically ~30 seconds) you can open the valve to the collection flask.
Continue to collect your main body until the color is too red or the distillation slows to a crawl. You can adjust your distillation speed with your temperature (hotter will go faster), but the distillation head has a speed limit. You want stuff flowing up and down at the same time in the column. If there is a floor created by the upward flow the column is flooded and separating poorly. If this happens lower the temp, allow the column to settle, and begin adjusting the temperature up again, but more slowly this time. You can continue up to 220°C, but do not exceed this temp. If the distillation slows you may be ending the fraction.
Collect tails fraction of re-distillation at another time.
Finishing Up
When completed you should have 2-3 fractions of distillate that has been separated. Your second or main fraction will contain the compound you have targeted, in this case thc. If done properly you will achieve a very pure thc distillate with a decent production capacity based on the size of your short path.
For Help With Your Shortpath Kit
Do you need help selecting, setting up, or fine tuning a short path distillation kit? Goldleaf has been supplying and educating the community for over 5 years about the practice of short path distillation.
Call us anytime at (510)487-1390 for help with any questions. Or email us at [email protected] to get more info about the Goldleaf Scientific short path set ups.
Short path distillation involves heating a liquid mixture in a round-bottom flask to evaporate the desired component, which travels a short distance to a condenser and is collected as a purified distillate. Key steps include setting up the glassware with proper seals, applying vacuum to reduce boiling points, and gradually increasing heat to achieve selective evaporation.
Hello, if you still need any assistance with your short path give us a call at (510)487-1390
Thanks for asking!
1.) We want a warm condenser to help other gases stay warm and pass over the thc fraction and condense your end product while having undesirable vapors pass right over. The warm condenser is only set to about 90-120c
2.) A short length condenser is better for cannabinoids since they condense fairly easily, a longer condenser would be better for more volatile compounds that are harder to condense.
Hey thanks for this. Couple questions. 1) why warm the condenser? I thought we wanted this part cold so the gasses will re-condense to liquids. Is it because at the warmer temps THC will condense but terps wont?
2) What do you think about length of distillation tube and condenser? I'm building a system and am wondering if I should get those longer or shorter. Longer seems better in terms of being able to fraction more efficiently (for distillation tube) and less loss of vapor to the cold traps (for condenser). thoughts? Thanks!
Great Job. Thanks
Great Job. Thansk
I could use some advice running my short path.